This is one of the fastest projects with a huge satisfaction factor. The placemat comes with a border and all the edges finished, and could really be completed in a half-hour without the "extras" .....like the pockets and buttons.
Here is a photo of the inside, with the pockets I added.
And turned inside out, you can see the construction.
Just sew up the sides, then fold the side seam down so the center of the seam lines up with the center bottom, stitch across the bottom corners to miter it and voila! It's done.
The borders were already on the placemat, and make a nice touch to the sides.
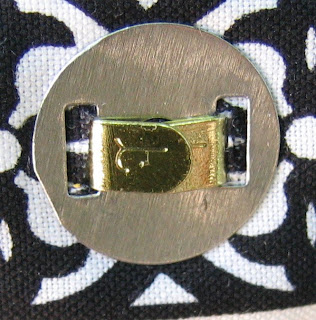
And adding the magnetic closure was easy-peasy....just cut two slits with your seam ripper, put the prongs through, add the backing, and pinch the prongs with your pliers. I added the buttons to cover the magnetic closure.
One side note: the pockets are just folded fabric, and don't even need to have the edges finished if you sew them at the same time as the straps. I ironed the raw edges under before stitching. You will need to stitch across the bottom of the pocket if you don't want everything to fall out of them. (smile)
The only thing I would change, is that since the bag is somewhat shallow, I might permanently attach a zippered pouch for keys or change.
So much fun for an afternoon.
p.s. This isn't any cheaper than buying a Vera Bradley bag, it's just one you can make yourself.


7 comments:
Marie, that is so cute! I might even be able to pull that one off. Thanks for the tutorial.
I LOVE this! Those place mats were perfect for this project.
This is amazing! Such a clever idea!
xo Erin
I am posting you up on my blog!! Love this tutorial!
So stinkin cute!
You need to come over to Midchix.com and link this up in the Craft Mamas Flock! Free Link Love!
http://www.midchix.com//mod/riverdashboard/
How many placemats did you use?
This is so cute!
I only used one placemat, but a larger tote could be made with two. There's fun in the reversible nature of the placemat, too.
Post a Comment